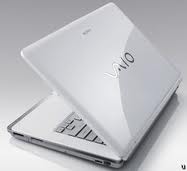
 Sony notebook computers must be taken apart to reset the BIOS password to the factory default when the current password is forgotten or simply unavailable. A small battery inside the computer must be removed for a period of time in order for the password to reset. This requires notebook repair skills specific to Sony notebooks, and should only be attempted by a technician who is familiar with the process of taking Sony notebooks apart and putting them back together without damaging the parts.
Two way to remove BIOS password
1) Soft reset
2) Hard reset
Soft Reset
BIOS passwords can be reset in two ways,
1. using software 2. using hardware.
I would first try resetting using software, here are two software's to reset or retrieve BIOS passwords.
!BIOS - is a PC BIOS toolkit offering password removal/decrypt and BIOS settings modification/backup/restore.
CmosPwd - Cmos password recovery tools
Hard Reset
Step 1
Back up the hard drive to optical discs, an external hard drive or a network location to safeguard any important files.
Step 2
Shut down the computer by clicking "Start" (Windows Orb) and choosing "Shut Down."
Step 3
Disconnect the Sony notebook power adapter cable from the wall and from the back of the laptop.
Step 4
Close the lid and flip the notebook over to expose the bottom screws and compartments.
Step 5
Remove the main battery from the bottom of the Sony notebook.
Step 6
Remove the compartment covers for the RAM and the hard drive.
Step 7
Remove the hard drive by unscrewing the bracket that holds the drive in place and pulling gently on the drive until it disengages from the socket.
Step 8
Remove the RAM by spreading the small metal retention clips that hold it into place, and then pivoting the RAM up slightly and pulling it out of the sockets.
Step 9
Remove each of the small screws from the bottom of the Sony notebook, and place them on a clean, flat surface in a pattern that represents which hole each screw came from.
Step 10
Gently flip the Sony notebook right-side up and open the lid.
Step 11
Separate the base of the Sony notebook from the upper case by gently pressing the plastic knife or credit card into the seam and pulling the top away from the bottom.
Step 12
Disconnect the wire that connects the small coin cell battery pack to the motherboard, or remove the coin cell battery from the socket, depending upon the model of the Sony notebook. Some models may require that the motherboard be removed from the case in order to access the battery.
Step 13
Wait one hour with the battery disconnected and reassemble. The BIOS password will be cleared and the computer will boot into the BIOS setup program or to the operating system. This process does not clear any operating system passwords.
Tips & Warnings
- Reset a known BIOS password on Sony notebook computers by entering BIOS setup using the "F10" key on startup. Enter the existing password, and navigate to the security screen in the BIOS setup program to choose a new password. Consult the owner's manual for specific instructions on particular Sony models. Use a blank piece of paper to set the screws as they are removed, marking them or arranging them as necessary. It is important to replace the exact same screw into each hole that it came out of as there are often several different sizes of screws.
- Notebook computers are assembled with small, delicate plastic tabs that are easily damaged. Internal cables and assemblies can be broken or damaged with relatively little force. Leave this technique to a professional technician if unsure of how to take a Sony notebook computer apart. Do not let the computer go into sleep or hibernation mode or simply shut the lid as this is not a full proper shutdown and the hard drive can become corrupted if the computer is not properly shut down for this operation.


0 comments:
Post a Comment