For those of you who like to use the quickest methods of getting things done on your computer, we have shown you many Windows shortcuts and hotkeys for performing useful tasks in the past.
(1)Create Keyboard Shortcuts to Applications in Windows
Do you need just one or a few special keyboard shortcuts for your favorite program(s)? A quick modification to program shortcuts will get you up and running without installing additional software.
Creating New Keyboard Shortcuts
Go to the start menu shortcut for the program, right-click on it, and select properties.
When the properties window opens click in the shortcut key text area. All that you need to do is choose an appropriate letter for the program (i.e. O for Opera, E for Editra, etc.) and type it in the blank.
You will not need to type any other keys or combination in…the “Ctrl + Alt +” will be automatically entered for you as soon as you type the letter in. Click OK to finish creating the new keyboard shortcut.
Those new keyboard shortcuts will speed up access to your favorite software.
Another example from our system using “I” for Iron Browser.
Certainly much quicker than using the start menu. Conclusion
If you only need one or just a few special keyboard shortcuts then this method provides a quick and simple solution.
(2) Create Custom Windows Key Keyboard Shortcuts in Windows
Nearly everyone uses keyboard shortcuts of some sort on their Windows system but what if you could create new ones for your favorite apps or folders? You might just be amazed at how simple it can be with just a few clicks and no programming using WinKey. WinKey in Action
During the installation process you will see this window that gives you a good basic idea of just what can be accomplished with this wonderful little app.
As soon as the installation process has finished you will see the “Main App Window”. It provides a simple straightforward listing of all the keyboard shortcuts that it is currently managing. Note: WinKey will automatically add an entry to the “Startup Listing” in your “Start Menu” during installation.
To see the regular built-in Windows keyboard shortcuts that it is managing click “Standard Shortcuts” to select it and then click on “Properties”.
For those who are curious WinKey does have a “System Tray Icon” that can be disabled if desired. Now onto creating those new keyboard shortcuts…
For our example we decided to create a keyboard shortcut for an app rather than a folder. To create a shortcut for an app click on the small “Paper Icon” as shown here. Once you have done that browse to the appropriate folder and select the exe file.
The second step will be choosing which keyboard shortcut you would like to associate with that particular app. You can use the drop-down list to choose from a listing of available keyboard combinations. For our example we chose “Windows Key + A”.
The final step is choosing the “Run Mode”. There are three options available in the drop-down list…choose the one that best suits your needs.
Here is what our example looked like once finished. All that is left to do at this point is click “OK” to finish the process.
And just like that your new keyboard shortcut is now listed in the “Main App Window”. Time to try out your new keyboard shortcut!
One quick use of our new keyboard shortcut and Iron Browser opened right up. WinKey really does make creating new keyboard shortcuts as simple as possible. Conclusion
If you have been wanting to create new keyboard shortcuts for your favorite apps and folders then it really does not get any simpler than with WinKey. This is definitely a recommended app for anyone who loves “get it done” software. Links Download WinKey at Softpedia
(3) Disable Win+X Shortcut Keys on Windows 7 or Vista
Windows 7 and Vista have all the same Windows+X shortcut keys as other versions of Windows, such as Win+E for explorer and Win+D for the desktop, but adds in all of the Win+<num> keys to launch the shortcuts in the Vista Quick Launch menu (or switch to apps in Windows 7), as well as Win+X for mobility center, etc. But what if you want to disable all these extra keys?
Turns out you can disable all the extra keys at once with a single registry entry, which I’ve provided as a downloadable registry hack. Manual Registry Hack
Just open up regedit.exe through the start menu search box and navigate to the following key (create if it doesn’t exist)
Create a 32-bit DWORD value called NoWinKeys and set the value to 1. You’ll need to log on and back off for the changes to take effect. Downloadable Registry Hack
To disable: Unzip the file and then double-click on the NoWinKeys.reg file to disable all the shortcut keys.
To enable: Unzip the file and then double-click on the RestoreWinKeys.reg file to re-enable all the shortcut keys.
Make sure that you log off and back on in order for this change to take effect. You could also restart explorer.exe through task manager if you wanted. Download DisableWinKeys Registry Hack
(4) Create a Shortcut or Hotkey to Turn the Desktop Icons On or Off
If you’ve got loads of icons cluttering up your desktop, you might want a quick way to turn them off without using the context menu, here’s a quick and easy way to make a shortcut key to turn them on or off. Note: this article was originally written a couple of years ago, but we figured we’d polish it up and update it for Windows 7 and share it with our readers again.
Create a Shortcut to Toggle the Desktop Icons
The solution comes through a small utility written by one of the Desktop Sidebar programmers (an alternate sidebar with loads of modules). Just so we’re clear, this utility does the same thing as a right-click on the desktop and toggling the “Show Desktop Icons” item. Setting Up the Shortcut
The first thing you’ll need to do is download the HideDesktopIcons application and save it somewhere other than the desktop, preferably somewhere where it won’t be deleted—you could put it under your Program Files folder if you wanted to.
If you’re using Windows 7, all you need to do is right-click on the file and choose Pin to Taskbar or Pin to Start Menu, depending on where you want it. We’ll put it on the Start Menu so we can assign a hotkey to it.
If you’re using a previous version of Windows and you’d like to put it on the Quick Launch bar, you can do that by opening up Explorer and typing the following into the address bar—just keep in mind that shortcuts on the Quick Launch bar don’t allow shortcut keys, so you’ll need to copy it to the Start Menu as well.
shell:Quick Launch
Now you have a shortcut that can be used for quick access…
To assign a hotkey, right-click on the shortcut in the Start Menu and choose Properties to assign a hotkey (I use Ctrl+Alt+D since it’s easy to remember).
Now you can access the desktop icons through a shortcut icon or shortcut key. Supporting Files (If Needed)
If you get an error when you try to run this application, you probably need to have the Microsoft C++ runtime installed, which you can get get from the following link: Microsoft Visual C++ 2005 Redistributable Package (x86) Download Application
Note: we normally wouldn’t host a download, but the original source appears to be gone. Download HideDesktopIcons Application (How-To Geek Mirror Copy)
(5) Create Administrator Mode Shortcuts Without UAC Prompts in Windows 7 or Vista
One of the most talked about annoyances in Windows Vista are the UAC prompts that constantly pop up when you are trying to make system changes. It’s especially irritating when you often need to run a particular tool that requires administrator mode in order to run. Thankfully there’s a simple hack that you can do to create an administrator mode shortcut that doesn’t prompt for UAC. Note: This should also work on Windows 7.
This works by setting up a scheduled task to run the application in Administrator mode, and then setting up a separate shortcut that tells the scheduled task to run. If that sounds difficult, it’s really not… just follow through the instructions below. Note: Because you are required to click through a UAC prompt to setup the scheduled task, it’s not really a security loophole. Create the Scheduled Task Item
Open up Task Scheduler through the start menu search box (usually you can just type task), and then on the right-hand side click the “Create Task” link:
The first thing you need to do is give the task a short, simple name, preferably without any spaces in it. Then check the box for “Run with highest privileges” (very important)
Now switch to the Actions tab, click the New button, and then browse down to the application that you are trying to start.
Close out of the dialogs by clicking the OK button, which should create the new task in the list. You can right-click on it and choose “Run” at this point, simply to make sure that it launches the application the way you were expecting.
At this point our scheduled tasks setup is done, so you can close out of that if you want… as long as you remember the name that you used for the task. Create the Shortcut to Start the Task
Right-click anywhere on the desktop and choose New \ Shortcut from the menu.
Now here’s where the real magic happens… we need to add a command that will run the scheduled task, passing in the name of the task that we used. As you can see, I used runregedit as the name for the task.
Make sure you enter the task name like this, replacing the capitalized letters for the name of your task. (It’s not case sensitive)
schtasks /run /tn “TASKNAMEINQUOTES”
Now give your shortcut some useful name, and then click next to create it.
At this point you should have a shortcut that will launch the application in administrator mode.
But we can tweak it a bit more… open up the properties for the shortcut, and then change the Run drop-down to “Minimized” (to hide the schtasks command line utility), and then click on Change Icon.
The simplest thing to do is just browse down to the application that you are opening with the shortcut… and you should see the icons for the application itself.
So now you have a nice looking icon that launches an application in Administrator mode… with no prompts whatsoever.
(6) Create Shortcut Icon to Disable / Enable the Screensaver
How many times have you been watching a long video on your computer and had the screensaver come on? Then you play the game of trying to jiggle the mouse every certain number of minutes to make sure it doesn’t happen again… seems like it would be easier to have a really quick way to disable the screensaver.
Our solution comes in the form of a little utility named flipss.exe which can be used to easily enable or disable the screensaver via a command line argument… we’ll just have to manually create shortcuts for each task. Create Disable/Enable Shortcut
Right-click on the desktop and choose New \ Shortcut from the menu.
You will need to enter in the full path to where you saved the flipss.exe file, followed by either “/off” or “/on”. For instance, if you saved the utility in C:\MyFiles you would use this path to create the disable icon:
C:\MyFiles\flipss.exe /off
On the next screen you’ll need to give it a useful name, and then create a second shortcut with “/on” which you can use to turn the screensaver back on.
You can give them different icons by going into the properties for the shortcut and choosing the “Change Icon” option. Personally I moved the icons into the quick launch bar for easier access and indexing in Launchy. Download Flipss.zip from jddesign.co.uk
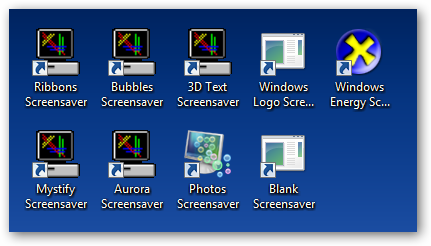
(7) Create Icons to Start the Screensaver on Windows 7 or Vista
Reader Jeffrey wrote in asking how to create an icon to start up the screensaver in Windows Vista. This question is so common that I figured I’d write up the answer for everybody, as well as provide a downloadable set of shortcuts to all the default screensavers (for Vista users). Note that this technique should work for Windows 7, Vista, or even XP. Create Screensaver Icon
Right-click on the desktop and choose New \ Shortcut from the menu.
In order to launch the screensaver, you’ll need to enter the full path to the screensaver file, followed by “/s”
%systemroot%\system32\Bubbles.scr /s
You would want to substitute the name of the screensaver where you see “Bubbles.scr” above. Also note that I used %systemroot% instead of C:\windows because not every install uses the C: drive.
If you don’t know the filename, you can browse down to your system32 folder and then search for “.scr” using the search box:
You should see all of the names of all the screensavers installed on your system, which you can use in the location field. Download Shortcut Icons (Vista Only)
If you’ve prefer, I made shortcuts for all the default screensavers and zipped them up. You can just download and extract the file, and then use whichever ones you want.
Note: I’m fairly certain I didn’t miss any default screensavers in the list, but it’s certainly possible since it’s 6am and I’m still awake. Download Start Screensaver Icons
(8) Change Desktop Resolution With a Keyboard Shortcut
Do you find yourself changing your monitor resolution several times a day? If so, you might like this handy way to set a keyboard shortcut for your most-used resolutions.
Most users rarely have to change their screen resolution often, as LCD monitors usually only look best at their native resolution. But netbooks present a unique situation, as their native resolution is usually only 1024×600. Some newer netbooks offer higher resolutions which may not looks as crisp as the native resolution but can be handy for using a program that expects a higher resolution. This is the perfect situation for a keyboard shortcut to help you change the resolution without having to hassle with dialogs and menus each time, and HRC – HotKey Resolution Changer makes it easy to do. Create Keyboard Shortcuts
Download the HRC – HotKey Resolution Changer (link below), unzip, and then run HRC.exe in the folder.
This will start a tray icon, and will not automatically open the HRC window. You don’t have to install HRC. Double-click the tray icon to open it. Note: Windows 7 automatically hides new tray icons, so if you can’t see it, click the arrow to see the hidden tray icons.
By default, HRC will show two entries with your default resolutions, color depth, and refresh rate.
Add a keyboard shortcut by clicking the Change button over the resolution. Press the keyboard shortcut you want to press to switch to that resolution; we entered Ctrl+Alt+1 for our default resolution. Make sure not to use a keyboard shortcut you use in another application, as this will override it. Click Set when you’ve entered the hotkey(s) you want.
Now, on the second entry, select the resolution you want for your alternate resolution. The drop-down list will only show your monitor’s supported resolutions, so you don’t have to worry about choosing an incorrect resolution. You can also set a different color depth or refresh rate for this resolution. Now add a keyboard shortcut for this resolution as well.
You can set keyboard shortcuts for up to 9 different resolutions with HRC. Click the Select number of HotKeys button on the left, and choose the number of resolutions you want to set. Here we have unique keyboard shortcuts for our three most-used resolutions on our netbook.
HRC must be kept running to use the keyboard shortcuts, so click the Minimize to tray icon which is the second icon to the right. This will keep it running in the tray.
If you want to be able to change your resolution anytime, you’ll want HRC to automatically start with Windows. Create a shortcut to HRC, and paste it into your Windows startup folder. You can easily open this folder by entering the following in the Run command or in the address bar in Explorer:
Conclusion
HRC- HotKey Resolution Changer gives you a great way to quickly change your screen resolution with a keyboard shortcut. Whether or not you love keyboard shortcuts, this is still a much easier way to switch between your most commonly used resolutions. Download HRC – HotKey Resolution Changer
(9) The "Up" Keyboard Shortcut for Windows 7 or Vista Explorer
The new Explorer window in Windows 7 and Vista doesn’t have an Up button, which drives me completely batty. Thankfully I found a keyboard shortcut replacement. Note: These screenshots are from Vista, but it works the same in Windows 7.
Let’s say I’m in my x:\wpmu\wp-content directory. Sure, I can usually click the “wpmu” part of the path and simulate the Up button, but it doesn’t always work, especially if I’ve lowered the size of the window or tiled two windows beside each other.
This window is 600px wide, shouldn’t I have an easier way to go Up? Turns out I do… if I just hit the following key combination: Alt+Up
Ahhh, so much better… now I’m in the parent directory!
Note that this is also the quickest way to get to the Desktop folder… just keep hitting Alt+Up until you get to the right folder.
Other interesting keyboard shortcuts for Explorer:
Alt+Right - Go forward
Alt+Left- Go back
Alt+D – Focus the address bar and select the current path.
F4 – Pop up the dropdown in the address bar, actually somewhat useful.
Alt+Enter – Properties of the selected file
Ctrl+Mousewheel – change the size of the icons
F11 - Put explorer into Fullscreen mode. Actually kinda weird, and I have no idea why this function is even there.
Enjoy!
(10) Create a Keyboard Shortcut to Access Hidden Desktop Icons and Files
This is a guest post by Joel Thomas (Mr.Byte) from www.lytebyte.com, where he writes How-to tips about Windows, Office and Internet Applications.
Most of us like me love to keep the icons and some files in the desktop for quick access but ironically I love a clean desktop too. But there is a simple tweak without any additional tool to get the best of both worlds, you can hide the desktop icons & files and create a custom keyboard shortcut to access those icons and files. Step 1: Hide the desktop icons and files.
Right click on the Desktop, go to View and uncheck the option Show Desktop Icons. Now you will have a clean desktop. Step 2: Create a Desktop shortcut to open Desktop Folder.
All the items in the desktop are stored in the folder under your user name. Click on Start button –> (your username) –> Desktop folder.
Right click on the Desktop folder and click Send to -> Desktop (Create Shortcut). This will create a desktop shortcut to open desktop folder. Step 3: Assign a Custom keyboard Shortcut to open Hidden Desktop Icons and Files.
Now open the desktop folder like mentioned in step 2.
Right click the keyboard shortcut for desktop you have created just now and click Properties.
Open Shortcuts tab and click on Shortcut Key box. Now click ALT + CTRL + any letter key to create a custom shortcut and click OK. I usually use ALT + CTRL + D to open desktop folder and Win + D to show desktop.
Now you can open all the hidden icons and files in the desktop in a folder to have a quick access at the stroke of a custom keyboard shortcut.
(11) Add Home Directory Icon to the Desktop in Windows 7 or Vista
One of the new changes in Windows 7 and Vista is that each user has a “Home” directory that is actually accessible and meant to be used. In XP and 2k, you had a hidden home directory that you weren’t meant to muck around in.
Some of the new features, like the Downloads directory, are only accessible through your Home directory, which is why it makes sense to put an icon for it right on the desktop.
To do this, click the Start button, and then right click on your User name. Choose the Show on Desktop option:
Now your home directory icon should show up on your desktop:
Alternate Method
You can also right-click on the desktop, choose Personalize from the menu, and then Desktop Icons on the left-hand pane.
From this screen, you can simply check the box for user’s files to add the icon to the desktop.
(12) Create a Shortcut or Hotkey to Clear the Clipboard in Windows
Have you ever copied something to the clipboard that you don’t want to leave there in case somebody else is going to use your computer? Sure, you can copy something else to the clipboard real quick, but can’t you just make a shortcut or hotkey to clear it?
And of course you can, with the built-in clip.exe utility in Windows 7 or Vista. It’s not really meant for clearing the clipboard, but with a little command line magic in a shortcut, we can make it do just that. Note: This is also useful if you copied a very large amount of data to the clipboard and you don’t want it wasting memory anymore. Create a Shortcut Icon to Clear the Clipboard
Right-click on the desktop or elsewhere, and choose New \ Shortcut from the menu.
Then in the shortcut location box, enter the following command:
cmd /c “echo off | clip”
At this point you’ll have an icon that will immediately clear the clipboard… but we can tweak it a bit further.
Right-click on the icon and choose Properties, and then change the Run drop-down to “Minimized” to make sure you don’t see the command prompt. You can also assign a shortcut key here.
If you click the Change Icon button and then browse down to this file, you can find a clipboard icon:
%SystemRoot%\system32\shell32.dll
Now we’ve got a nice-looking icon that will clear out the clipboard: Note: If you are using Windows XP, you can download clip.exe from Microsoft. Just save the file in the Windows directory and the rest of the hack should work for you.
(13) Create a Shortcut or Hotkey to Mute the System Volume in Windows
Have you ever had music playing loudly on your speakers when the phone rings… then you fumble for the speaker switch or the pause button on your music playing application while trying to answer the phone? Instead of bothering with that, I’ve always simply created a shortcut to mute the system volume instantly with the press of a key.
Of course this isn’t terribly helpful if you have a multimedia keyboard with a mute button onboard, but some computers just don’t have one, or you don’t want to run the software required to make the keys work. Create the Shortcut
In order to mute the system volume, we’ll use a small utility called NirCmd that we’ve mentioned numerous times before, since it’s the swiss army knife of useful shortcuts.
Right-click on the desktop and choose New \ Shortcut from the menu.
In the location box, you’ll want to browse down to the location of where you saved nircmd.exe, and then add “mutesysvolume 2″ as arguments. You’ll probably want to put quotes around the path to the executable, like this:
“C:\Path\To\nircmd.exe” mutesysvolume 2
Note: the “2″ argument tells nircmd to toggle mute, so if you use the shortcut or hotkey again, it will untoggle. I find that to be the most useful, but you could pass an argument of “1″ to only use mute. All of the arguments can be found on the NirCmd page.
Give the shortcut a useful name like “Toggle Mute”, and then open up the properties of the shortcut. Here you can assign a shortcut key, or you can change the icon to something else.
I found the speaker icon in the following file, but you can choose another icon if you’d like:
%SystemRoot%\System32\SndVol.exe
Remember when using a shortcut key, you’ll want to keep the shortcut on the desktop or move it into the Start menu… the shortcut keys don’t seem to work when the shortcut is in the quick launch menu.
Either way, you should now have a shiny new shortcut that will mute or unmute the system volume. Download NirCmd from nirsoft.net


.jpg)

0 comments:
Post a Comment